
Founder of KingKodes.

In this tutorial, we will guide you to use a sound sensor with an Arduino and LED. By the end of this tutorial, you'll be able to set up your Arduino to control an LED with a sound sensor module.
Materials Needed:
- Arduino board (e.g., Arduino Uno)
- LED
- Resistor (220-ohm)
- Breadboard
- Jumper wires (Both male-to-male and male-to-female)
- Sound Sensor Module
Sound Sensor Module:
The Arduino sound sensor KY-038 module is a portable device designed to detect sound signals in its surroundings. It has a receiver to receive analog sound input and a potentiometer to control the threshold of the sensor.
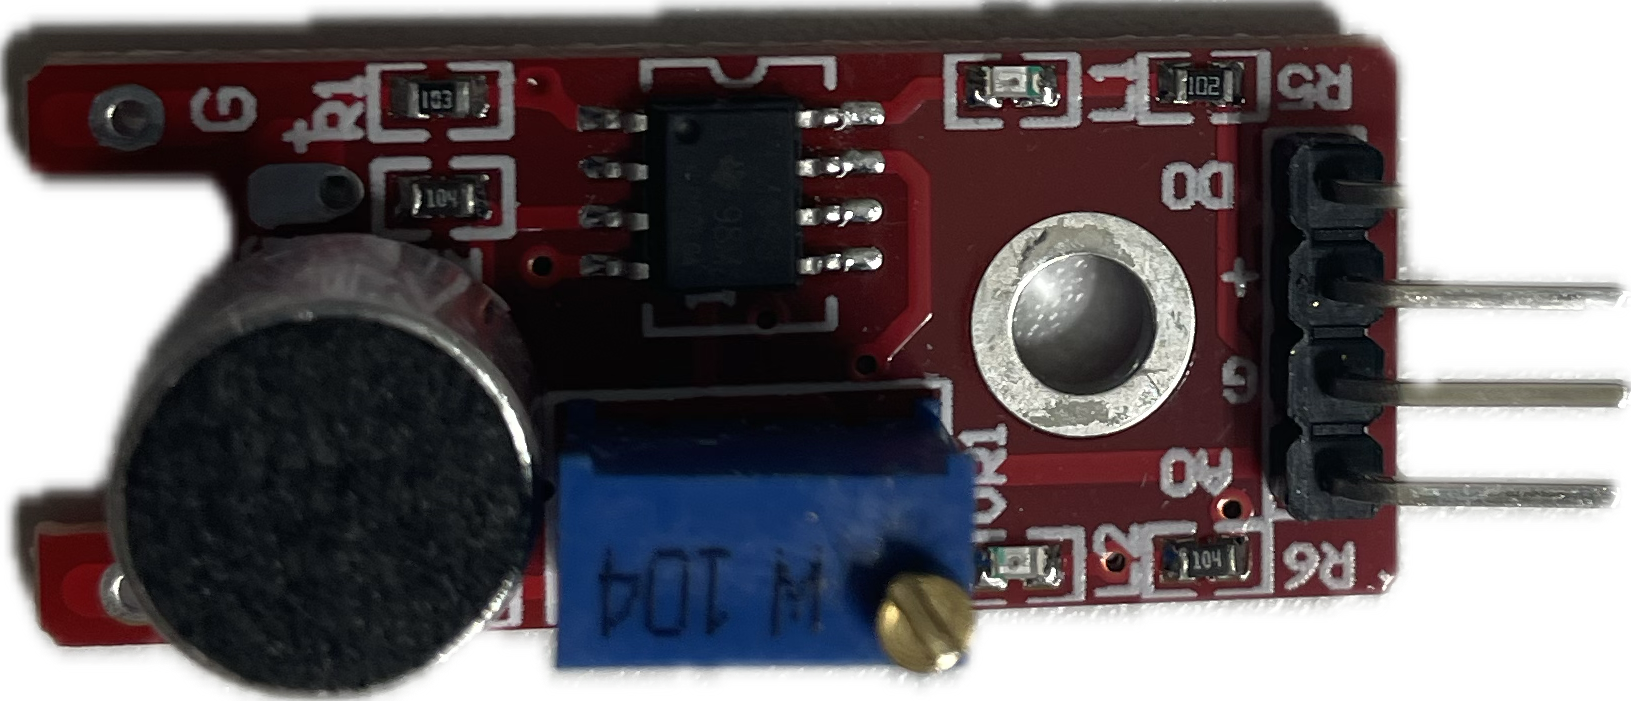
There are 4 pins on the digital sound sensor. They are :
- AO - Analog pin
- G - Ground pin
- + - Positive power pin
- DO - digital output pin
Step 1: Building the circuit

- Connect the LED to the middle of the breadboard.
- Connect the 220-ohm resistor in series with the LED, connecting the other end of the resistor to digital pin 8.
- Connect the shorter leg of the LED to the ground (GND) pin on the Arduino.
- Connect the "+" pin to the 5V pin on the Arduino.
- Connect the "G" ground pin to the GND pin on the Arduino.
- Connect the "DO" digital output pin to any analog or digital pins on the Arduino. In this tutorial, I connected it with A0.
Step 2: Coding
1//initialize pin numbers for sound and led
2const int ledPin=8;
3const int soundPin=A0;
4//initialize soundValue and the threshold for sound
5int soundSensValue=0;
6int threshold=550;
7
8void setup() {
9  // put your setup code here, to run once:
10  //initialize LED pin as an output and soundPin as an input
11  pinMode(ledPin,OUTPUT);
12  pinMode(soundPin,INPUT);
13  Serial.begin(9600);
14}
15void loop() {
16  //read the value from sound sensor
17  soundSensValue=analogRead(soundPin);
18  Serial.print("Sound sensor value: ");
19  Serial.println(soundSensValue);
20
21  //check if the soundValue is less than or equal to the thresshold, if so turn on the LED
22  if (soundSensValue>=threshold) {
23    digitalWrite(ledPin,HIGH);
24    delay(1000);
25  }
26  //else turn of the LED
27  else {
28    digitalWrite(ledPin,LOW);
29  }
30}
Note: Please adjust your sensor potentiometer as described in the video linked below before uploading your code.
Step 3: Upload the Code to Arduino and clap your hands
- Connect your Arduino board to your computer using a USB cable and upload the code.
- Once the code is uploaded successfully, you will see the LED turning on whenever you clap your hands.
Link to the code:
Loading...
The home of Arduino and Electronics Fun.
© Copyright 2023, KingKodes. All rights reserved.